Screen Printing Oversized and All-Over Prints: Color Separation, Halftone and Prepress Strategy for Large Placements

Oversized and all-over prints magnify every weakness in a screen printing workflow. A registration error that is barely visible on a 9-inch chest print can become obvious at the far edge of a 20-inch front panel. A gradient that looks smooth at standard size can show banding when expanded. A heavy underbase that feels acceptable in a small graphic can turn a large garment print into a stiff layer of ink.
The solution is not simply using a larger screen. Large placements require coordinated decisions across screen size, platen support, mesh count, halftone frequency, color separation, underbase coverage, film output, and press setup.
This step-by-step workflow explains how to prepare oversized fronts and backs, full-panel graphics, sleeve-to-sleeve designs, and wraps that cross side or shoulder seams.
1. Define the screen printing placement before separating artwork
Start by identifying whether the job is an oversized placement or a true all-over print.
An oversized front or back generally stays within one garment panel, even if it extends beyond a standard 12-inch print. An all-over or wrap placement may cross side seams, shoulder seams, sleeves, collars, or hems. These are not interchangeable production targets.
Record the following before opening your separation software:
Finished print width and height
Garment size range
Front, back, sleeve, or wrap placement
Side and shoulder seam locations
Platen dimensions and usable print area
Screen dimensions and frame clearance
Ink system and desired hand-feel
Target mesh count and halftone frequency
Whether the artwork will be printed as one panel or split into tiles
This intake step prevents a common failure: separating artwork for a print area that the press, platen, or exposure unit cannot actually cover.
A 24-inch film may not fit a standard output device. A 20-inch artwork may technically fit a screen but leave insufficient registration margin. A platen may support the garment in the center while allowing the edges to shift during a long squeegee stroke.
Large-placement prepress begins with the mechanical limits of the production equipment.
2. Understand why large screen printing placements fail
Large prints create more opportunities for mechanical variation.
Film size versus platen and screen size
The final artwork must fit within the smallest limiting component: film output, exposure area, screen interior, platen, or press stroke. If a design exceeds the output device, it must be tiled with controlled overlap and registration marks. If it exceeds the platen, the garment may move or deform during printing.
Off-contact drift across a large screen
Off-contact that is consistent near the center of a screen may not remain consistent across a long stroke. Frame flex, uneven screen support, and platen height can change how the mesh releases from the garment at the far end.
Tension loss on oversized mesh
Large screens are more sensitive to tension variation. A low-tension area can produce softer edges, inconsistent dot transfer, or a registration shift between channels. The problem becomes more visible when the print crosses seams or includes fine type.
Uneven squeegee pressure
On a 20-inch or longer stroke, pressure may not be uniform from one side to the other. Too much pressure can force excess ink through the near edge while starving the far edge. Too little pressure can leave weak coverage, especially in large solid areas and underbases.
Before blaming the color separation, verify that the screen is properly tensioned, the platen supports the garment, and the squeegee is suitable for the stroke length.
3. Choose mesh count and halftones together
Mesh selection at large format is a balance between ink deposit and detail.
For many oversized plastisol apparel jobs, a practical starting range is approximately 110–160 mesh for channels that need reliable coverage across a long stroke. Lower mesh allows more ink to pass and can help prevent the far edge from looking weak. However, it also increases total ink deposit and may make a large print feel heavy.
High mesh counts can hold finer detail, but they may starve broad areas when the squeegee pressure and stroke length are not perfectly controlled. This is especially noticeable in large white underbases and gradients.
Halftone frequency must change with mesh count:
110–160 mesh: Start around 35–45 LPI for large tonal areas and apparel halftones.
156 mesh: Approximately 45 LPI is often a safer starting point for an oversized garment print than immediately using 55 LPI.
230 mesh and above: 50–55 LPI may be appropriate when the press, exposure, ink, and garment can support finer detail.
These are starting points, not universal specifications. Thread diameter, tension, emulsion thickness, dot shape, ink viscosity, squeegee durometer, and press settings all affect the result.

The important rule is simple: when mesh drops to protect ink deposit, halftone LPI usually needs to drop as well. Trying to hold a 55 LPI halftone on an open mesh can lead to dot loss, excessive gain, or moiré. Always validate the combination on the actual garment and screen line.
4. Manage large gradients and halftones before output
Large artwork changes how the eye perceives tonal transitions.
A gradient that looks smooth at 9 inches wide may show visible steps at 14 inches because the viewer can inspect a larger area. A halftone rosette that disappears in a small print may become obvious across a full front panel. Banding can also appear when a gradient contains too few tonal steps or when channels are separated without enough overlap between adjacent values.
During the color separation review, inspect:
Large fades from solid to transparent
Skin tones and photographic transitions
Shadow areas near garment-color knockouts
Repeating dot patterns
Areas where multiple halftone screens overlap
Fine type placed over a textured or tonal background
Use conservative angles and dot shapes appropriate for your RIP and mesh combination. If the design is intended for a lower mesh, simplify fragile detail before separation rather than expecting the press to reproduce it later.
InkSplit’s channel previews make it possible to inspect each separated plate before film output. This is particularly useful when a large gradient appears acceptable in the composite artwork but reveals weak or disconnected information in an individual channel.
5. Control ink film thickness and hand-feel
An oversized design can contain dramatically more total ink than a standard print. The problem is not only how much ink is used in the full image; it is where the ink accumulates.
Large prints often build excessive coverage around:
Solid outer borders
Dark shadow regions
White underbases
Overlapping spot colors
Heavy edge treatments
Seam transitions
A full solid underbase may produce strong color on a dark garment, but it can also create a stiff hand-feel across the entire panel. Intelligent ink management reduces unnecessary coverage while maintaining opacity where it contributes to the image.
A practical approach is to use a tonal or selective underbase for gradients, photographic regions, and areas where the garment color can participate in the final appearance. Reserve heavier white coverage for colors and details that actually need it.
InkSplit’s smart underbase controls allow you to adjust base softness, contrast, and choke while reviewing the result in a live garment preview. That lets the separator evaluate brightness, edge control, and ink buildup together instead of treating the underbase as an isolated black-and-white plate.
6. Plan print order and flashing for heavy white coverage
Large white coverage requires more than simply adding a white screen.
Determine whether the job needs:
A controlled underbase
A flash after the underbase
Additional white or highlight white
A print-flash-print sequence
A reduced white deposit to protect hand-feel
Flashing must be even across the full panel. An under-flashed near edge can pick up on the next screen, while an over-flashed far edge can create a hard, glossy surface that changes how later colors sit.
For large panels, use the smallest practical white deposit that produces the required opacity. Then confirm that the print order supports registration and color cleanliness. Heavy white should not be allowed to create a raised ridge at seams or force later screens to ride over uneven ink.
7. Separate wrap and split prints around the garment
When a design crosses a side seam, registration planning becomes part of the artwork itself.
If the print is split into front and back panels, establish a shared coordinate system and include overlap or alignment references. A 1/16-inch shift at the seam may be enough to create a pale haze, exposed garment color, or broken outline.
Use these strategies:
Place the seam in a low-detail region whenever possible.
Avoid putting small type, faces, thin outlines, or critical registration points directly on the seam.
Add controlled trapping or spread so minor movement does not expose the garment.
Keep the seam transition away from the densest underbase coverage.
Include registration marks outside the live artwork area.
Confirm the garment is held consistently on the platen.
A wrap should not be treated as one enormous flat illustration without considering how fabric thickness changes at the seam. The artwork, separation, and press setup should all acknowledge the physical interruption.
8. Build a reliable large-format prepress and RIP workflow
At large size, film output must remain dense and consistent from edge to edge. Check for:
Maximum film width and height
Tiling overlap
Registration marks on every tile
Consistent transparency film density
Correct orientation and mirroring
Uniform RIP curves across channels
Halftone LPI, angle, and dot shape
Film alignment on the exposure unit
If the print exceeds the film or exposure area, tile it with enough overlap to reconstruct the image accurately. Do not rely on manually guessing where two film sections should meet.
InkSplit supports image scaling and trimming for establishing the intended printable area before separation. Its built-in RIP workflow can then carry approved channels toward calibrated film output. For shops that cannot cover an oversized panel with their press or exposure equipment, DTF may be a better option for the specific placement. Confirm film size, white-ink behavior, mirroring, printer profile, and powder adhesive requirements before choosing that route.
9. Run the InkSplit workflow from artwork to reorder
A repeatable large-placement workflow looks like this:
Upload and size the artwork to the exact finished dimensions.
Trim unnecessary borders and confirm the printable area.
Select the garment color and intended placement.
Choose the separation strategy, including spot color, simulated process, or CMYK elements.
Generate channels automatically and review the base white, process colors, black, and highlight.
Adjust underbase softness, contrast, and choke for opacity and hand-feel.
Apply shop-specific mesh and halftone targets, such as a conservative 45 LPI starting point for a 156 mesh oversized setup.
Preview the complete print on the garment color at final size.
Inspect individual channels for weak edges, banding, excessive coverage, or seam-sensitive detail.
Export through the RIP for film or DTF output.
Save the project in cloud storage with the garment, placement, mesh, LPI, ink, and underbase notes.
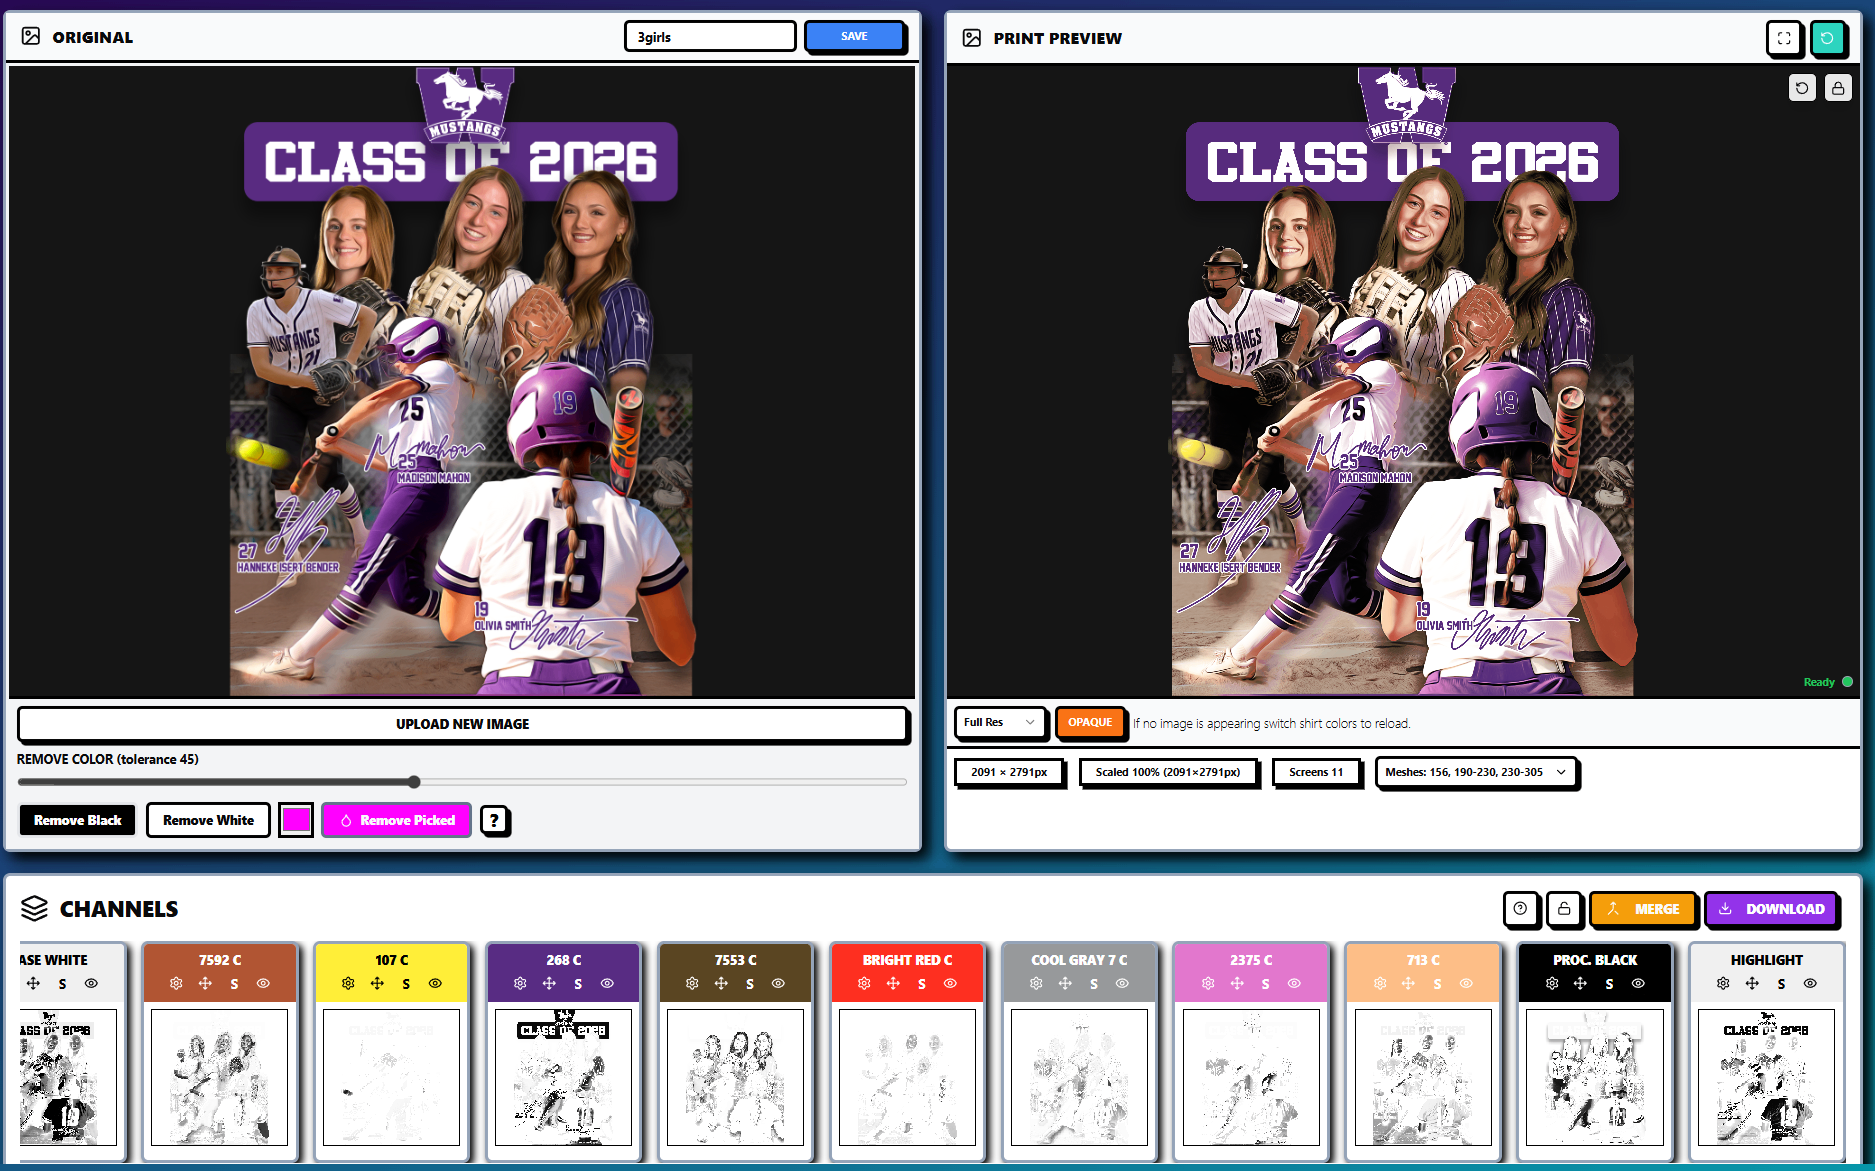

This process replaces repeated manual rebuilding with a documented production record. When the customer reorders the same wrap or requests the design on another garment color, the shop can reopen the project instead of starting from the original artwork.
For more information, review the InkSplit features, read about standardizing a screen printing prepress queue, or explore the cloud archive workflow for reorders.
Large placements will always demand careful press setup. But with calibrated color separation, intelligent ink limits, live garment previews, consistent RIP output, and saved project data, oversized screen printing becomes a controlled workflow rather than a trial-and-error job.
Comments